Connect Chief to Claude Code, Cursor, or Codex and start asking questions in minutes — no SDK or curl required.
Chief gives your AI coding agent direct access to your project. Ask questions about
everything your team has uploaded, add new documents, and automate the busywork —
right from Claude Code, Cursor, or Codex. No SDK, no curl, no boilerplate to get
started.
Claude Code runs on your computer, not in a browser tab. You may have chatted with Claude
on the web — Claude Code is different: it runs in your terminal, so it can reach your files and
your Chief project and build things for you. Once it’s connected you can both ask Chief
questions and hand it these docs and have it build an integration for you. This guide sets
up both.
An AI coding agent installed — Claude Code,
Cursor, or Codex. This guide uses
Claude Code in its examples.
A terminal — the macOS Terminal app, or Windows Terminal / PowerShell on
Windows. This is where you run the commands below.
A Chief account with access to a project.
New to the terminal or Claude Code? Start here.
The terminal is a text window where you type commands instead of clicking. To open one:
macOS — press Cmd + Space, type Terminal, and press Enter.
Windows — press the Start button and type Terminal, PowerShell, or Command Prompt. Any of the three works.
Claude Code is the agent that runs inside that terminal. Install it by following the
official install guide, then type
claude in your terminal to start it. Once it’s running, come back and follow the three
steps below.If the install is blocked or warns you:
Windows may show “Windows protected your PC” (SmartScreen). Click More info → Run
anyway.
macOS may say the app “can’t be opened.” Open System Settings → Privacy & Security
and choose Open Anyway.
Locked-down work computers often block new software outright. If an install is refused
no matter what, run through this on a personal computer instead.
These warnings are normal for new developer tools — they aren’t errors. Install only from the
official links above, then allow it to run.
If you don’t have it yet, install Claude Code with the recommended native installer:
curl -fsSL https://claude.ai/install.sh | bash
irm https://claude.ai/install.ps1 | iex
Then type claude in your terminal to start it. For other install methods and
troubleshooting, see the
official install guide. Prefer
Cursor or Codex? Use either — you’ll find their setup in step 4.
2
Get your Chief token
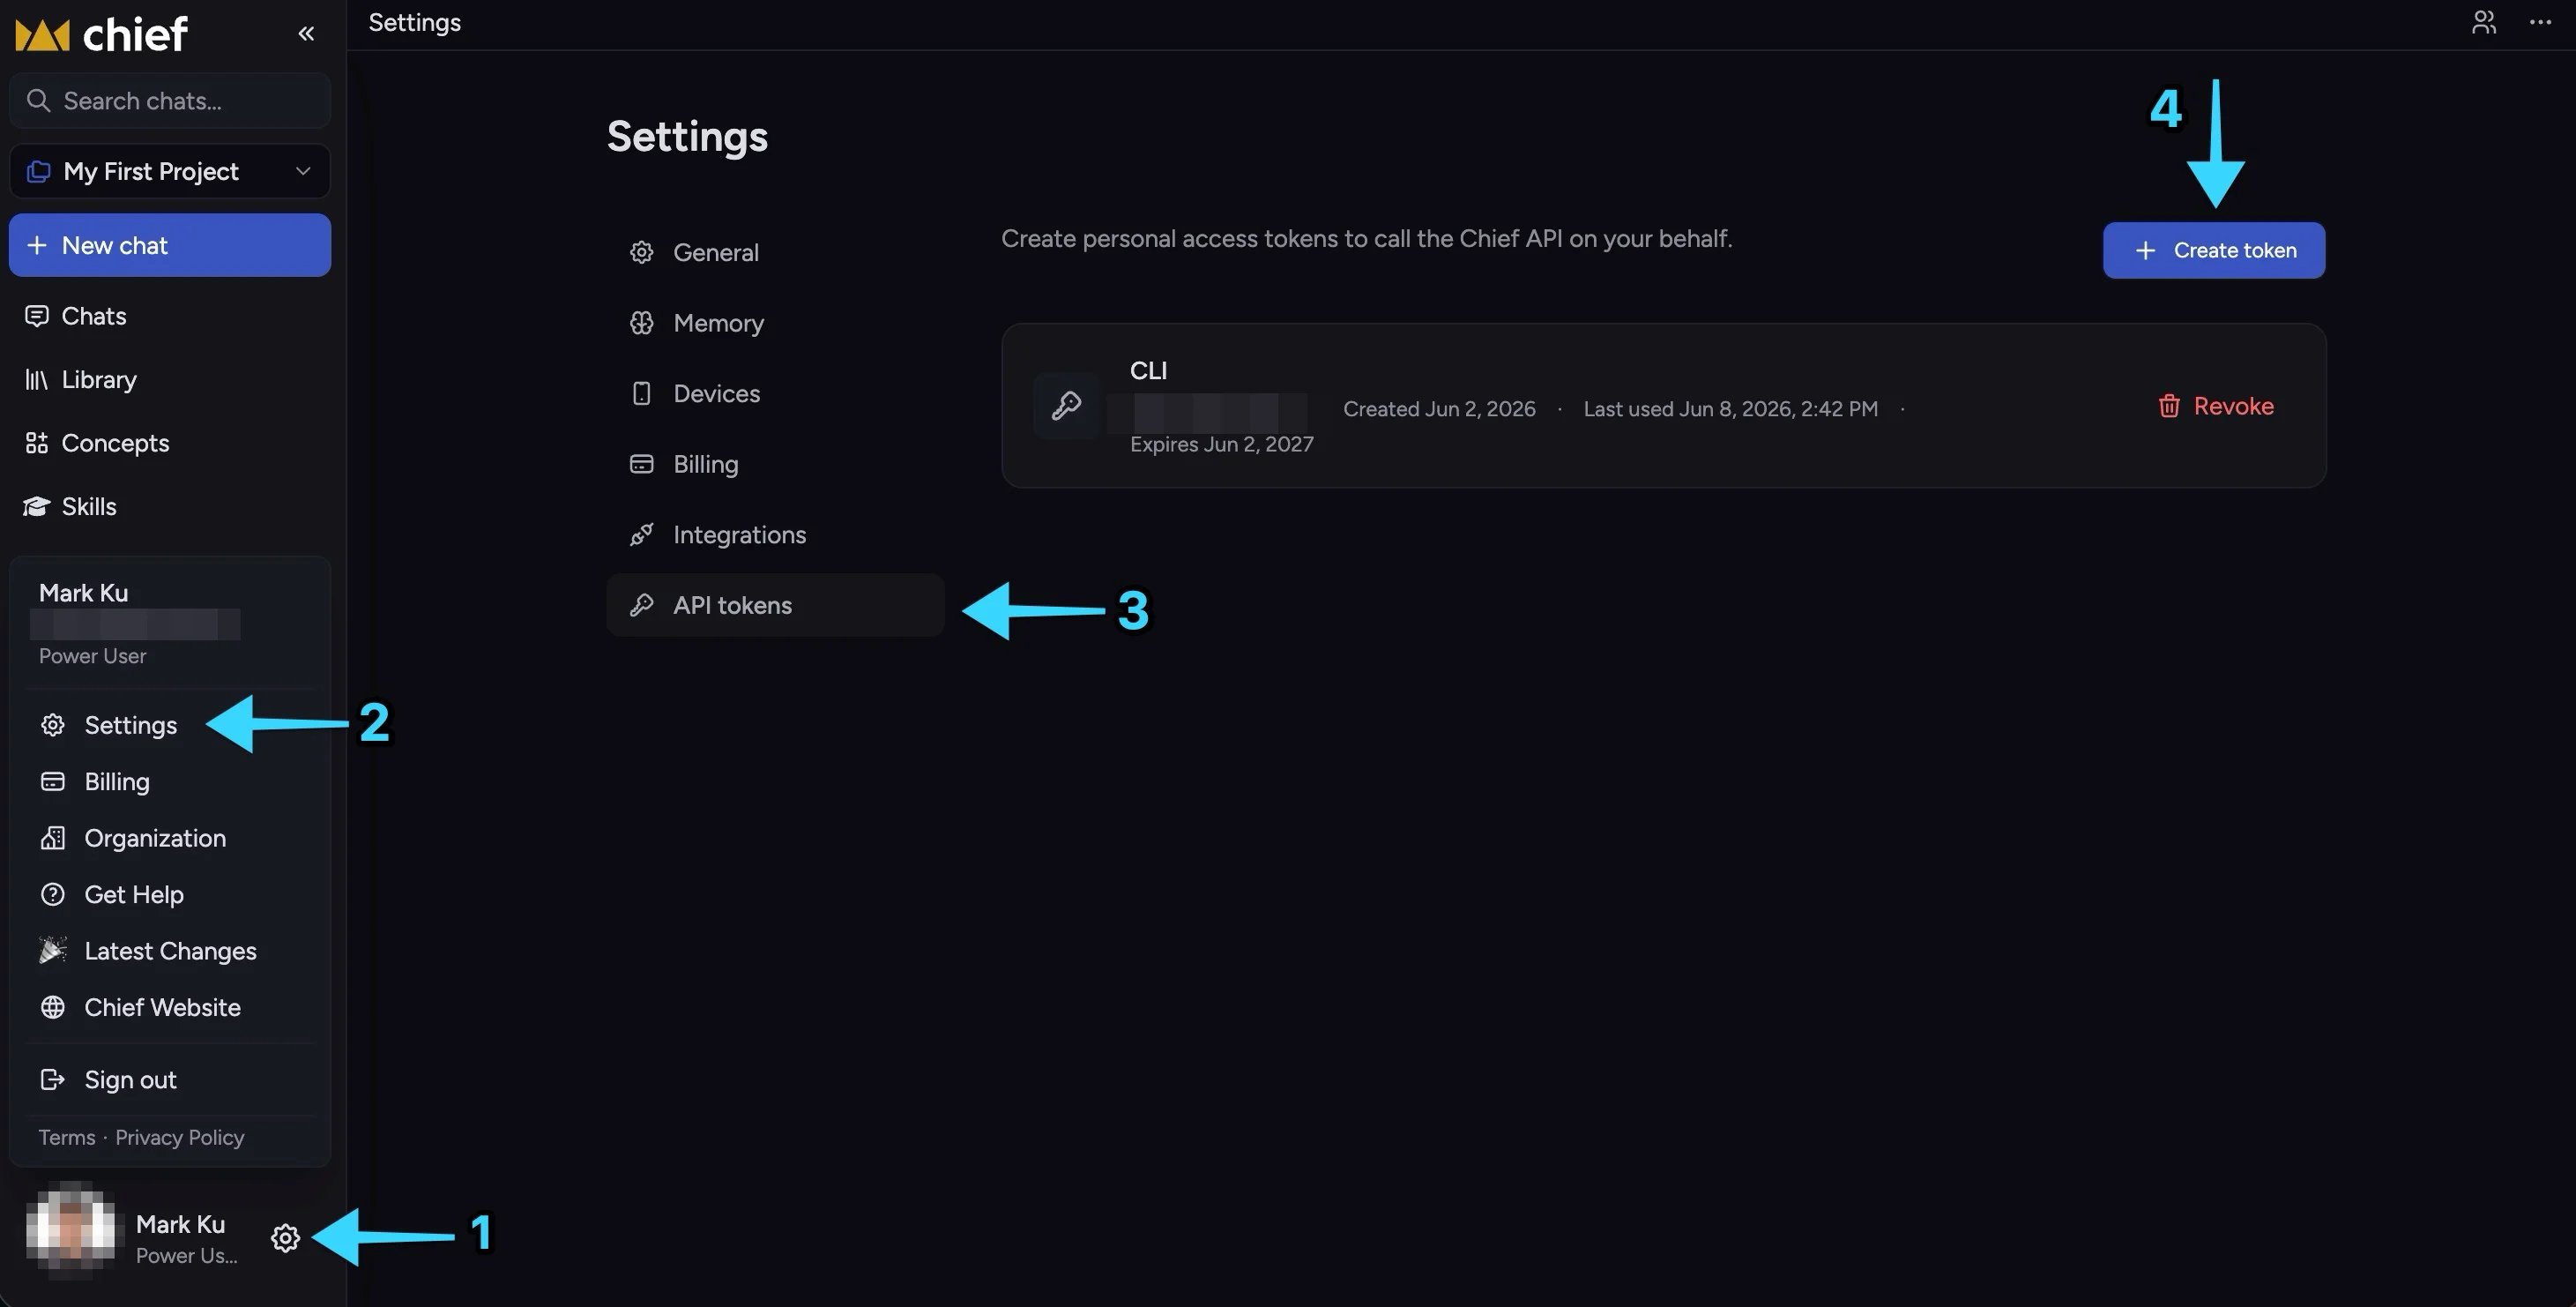
Sign in to Chief. Open your account menu (bottom-left), go to Settings, open the
API tokens tab, and choose Create token.
Account menu → Settings → API tokens → Create token.
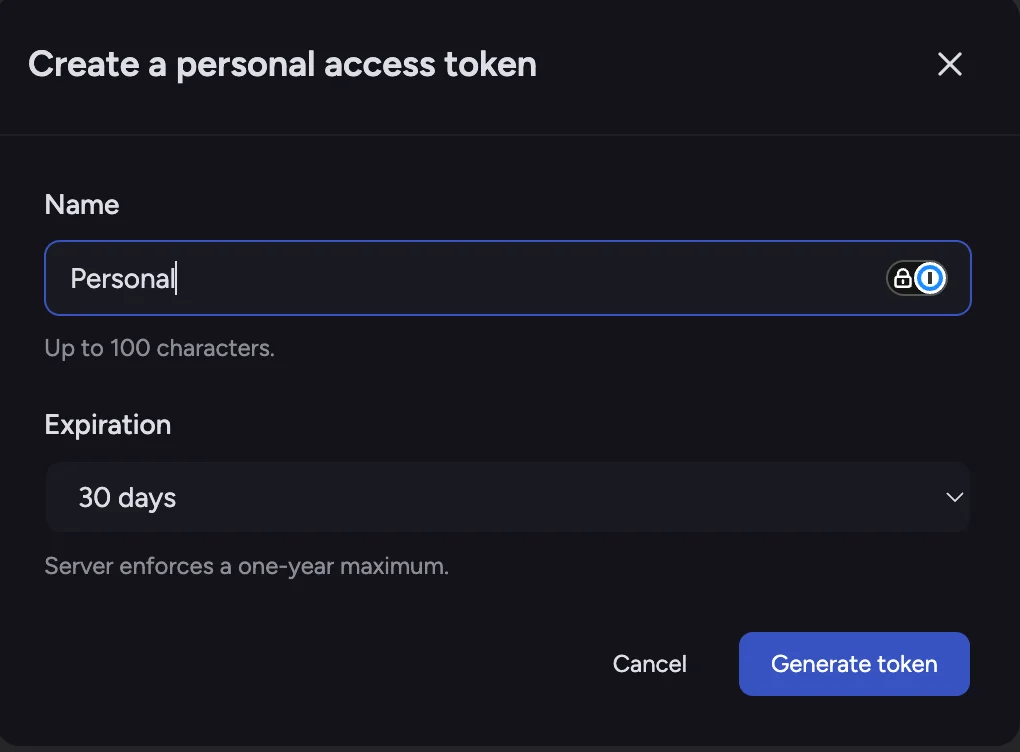
Give the token a name, pick an expiration, and select Generate token.
Name the token and choose an expiration, then Generate token.
Copy the token as soon as it appears — it starts with pat_.
The token is shown only once. Copy it now. If you lose it, delete it and create a
new one — there’s no penalty.
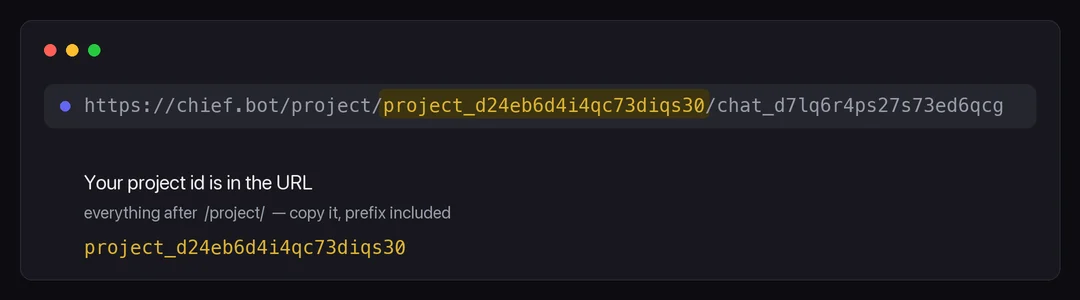
You’ll also need your project id (it starts with project_). Find it in the URL of
any project page — it’s the segment right after /project/:
Your project id is the /project/ segment of any project URL.
You’ll paste both into your agent’s config below.
3
Install the Chief MCP server
brew install --cask Storytell-ai/tap/chief-mcp
Other install options (Go, prebuilt binaries) are on the
MCP server page.
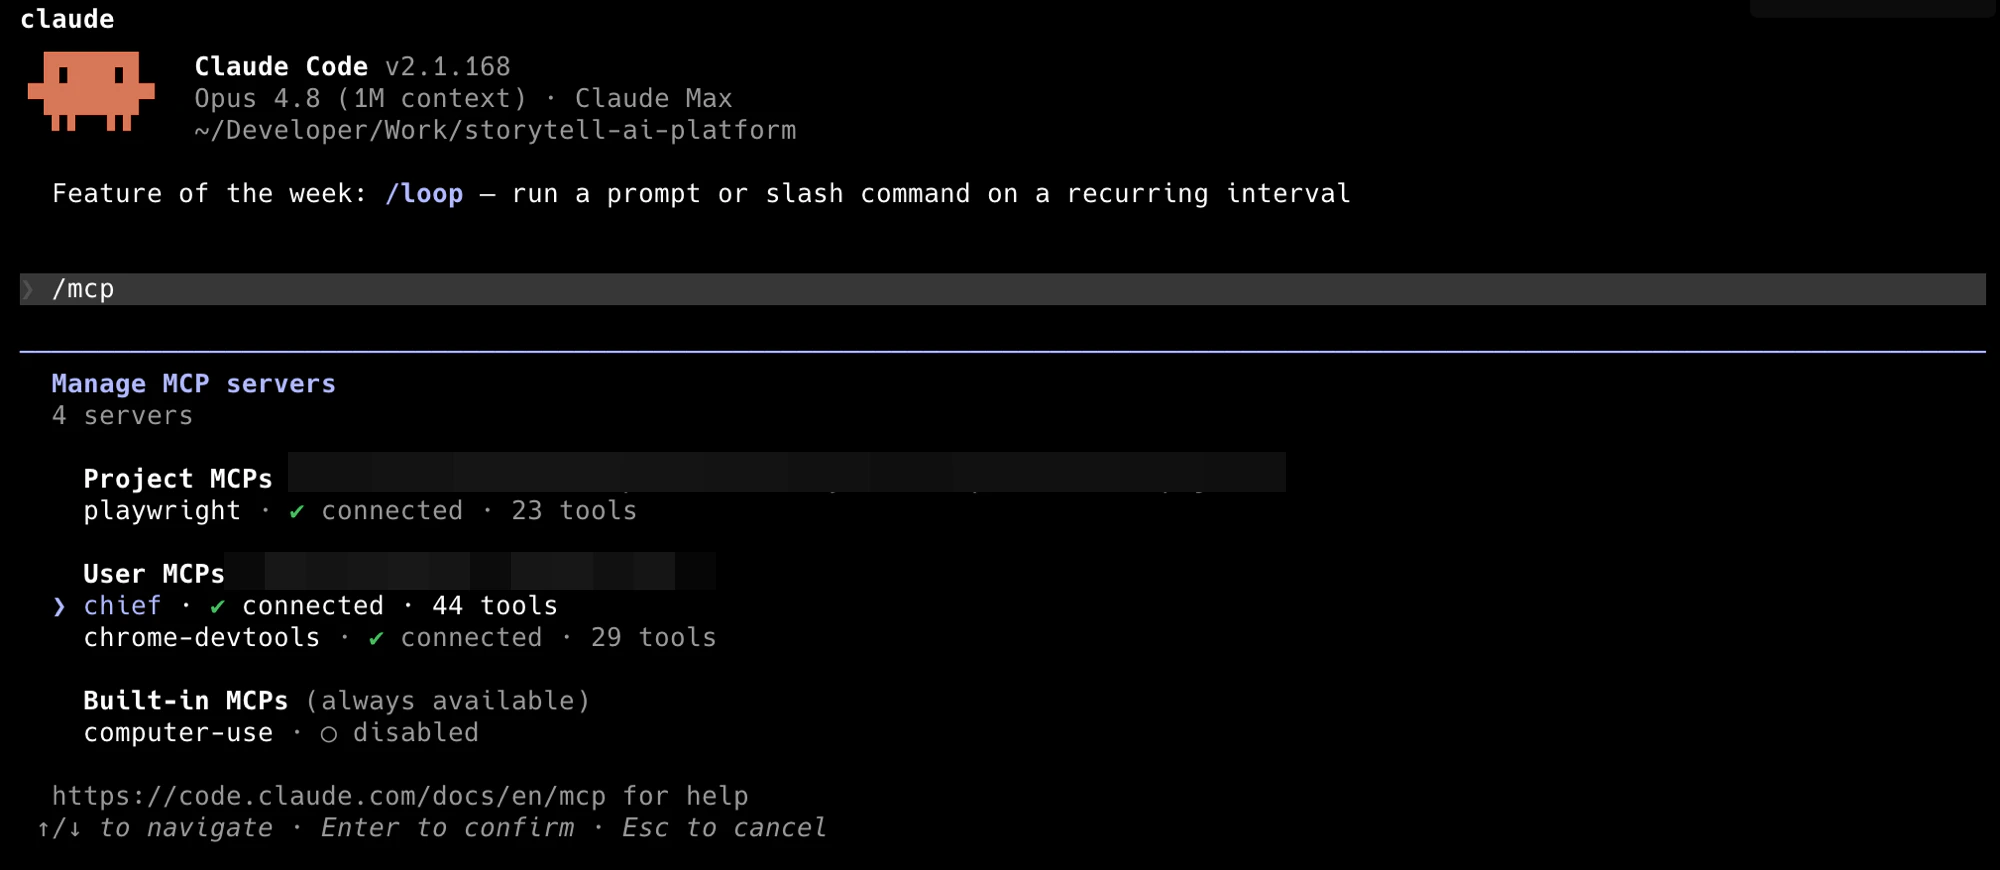
Restart Claude Code so it picks up the new server — that’s it.
After connecting, /mcp shows the Chief server and its tools — that's how you know it worked.
Using Cursor or Codex instead?
Cursor
Codex
After install, open the server in Cursor Settings → MCP and fill in your
CHIEF_API_KEY and CHIEF_PROJECT_ID. Prefer to paste config by hand? See
MCP clients → Cursor.
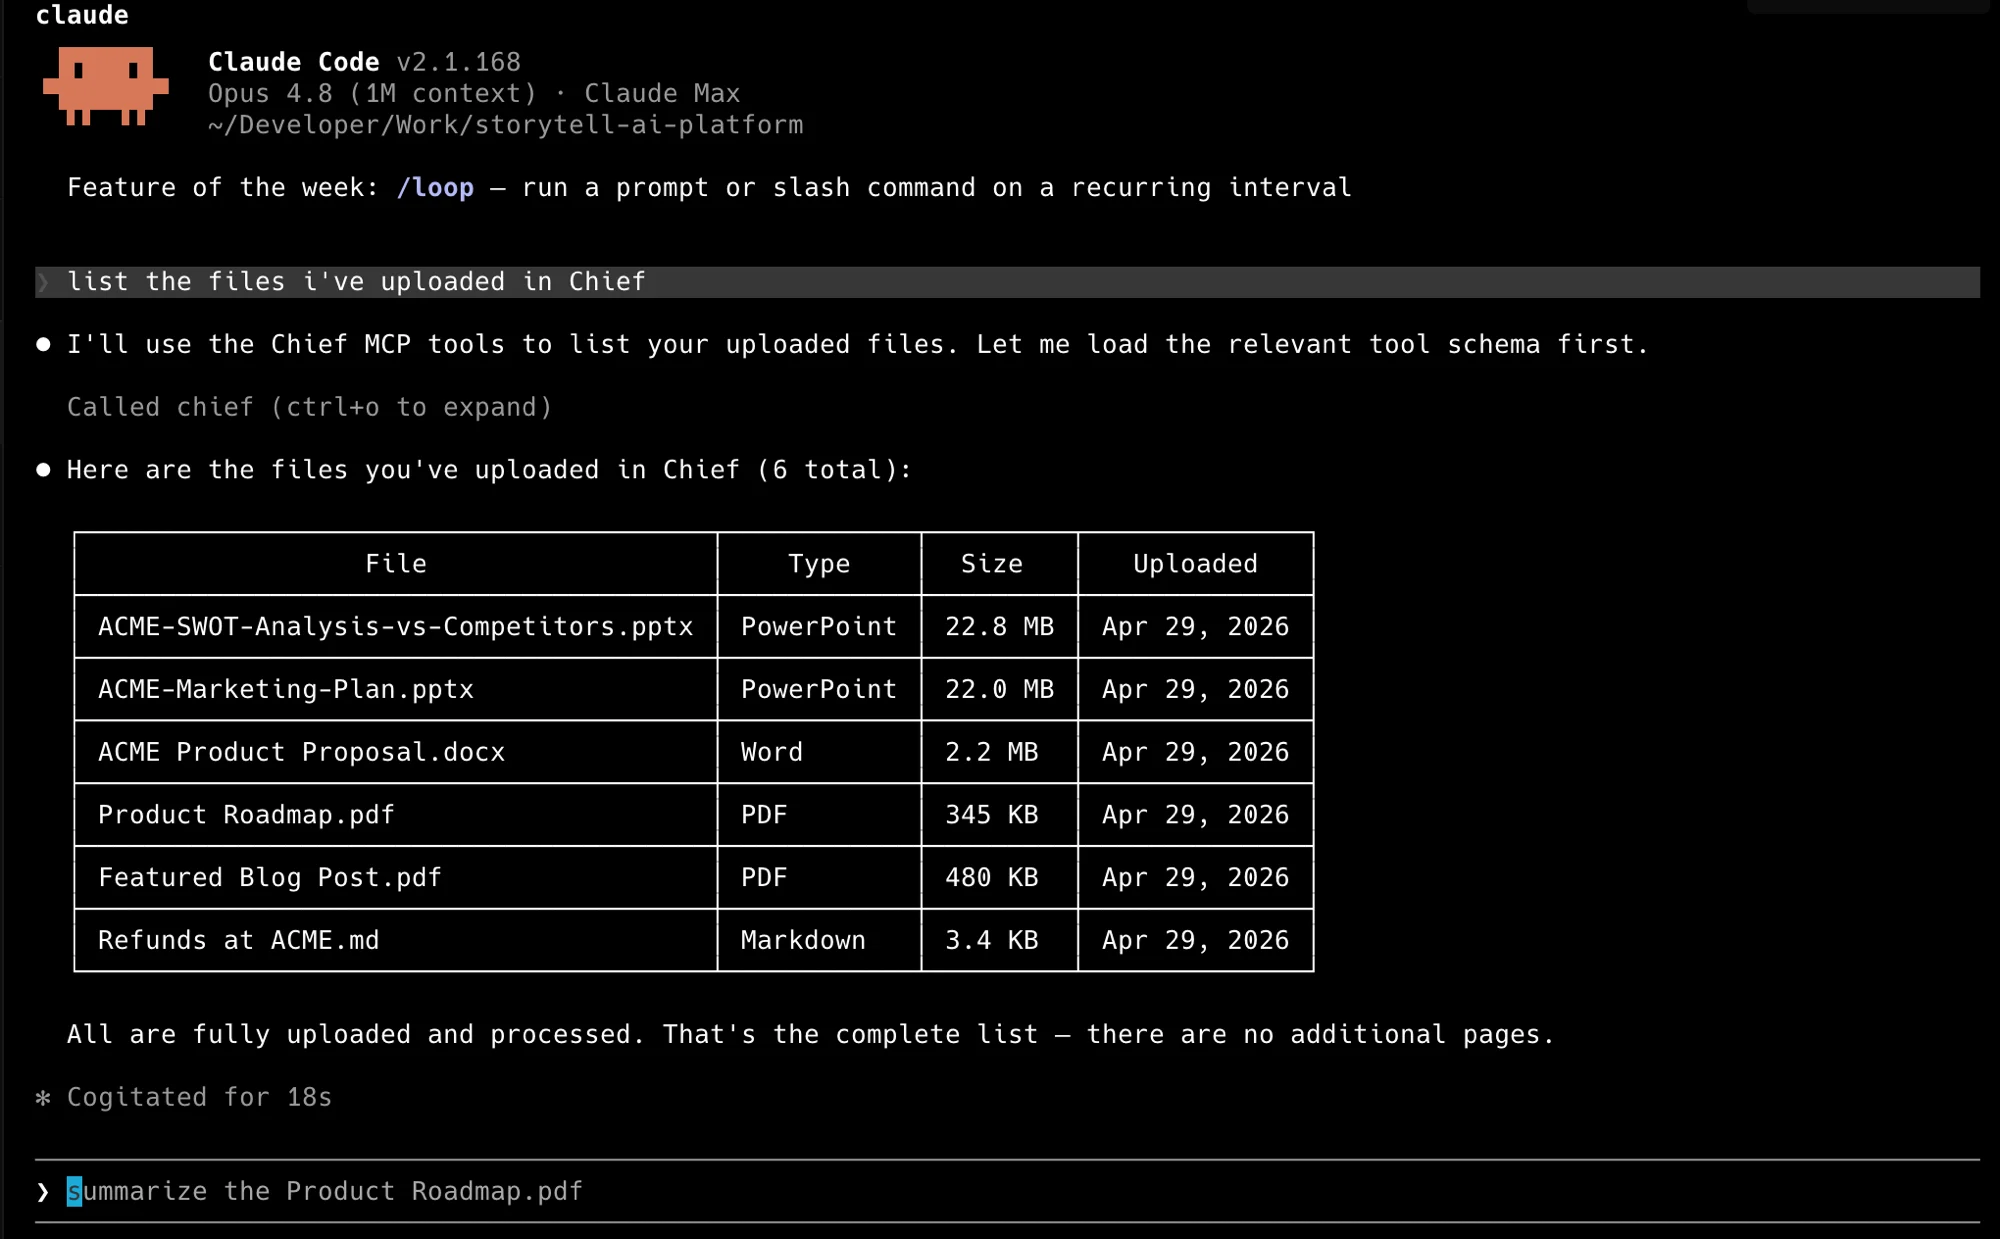
“Using Chief, what are the main themes across everything in my project?”
Your agent calls Chief, reads your project, and answers — no code from you. Ask it
anything about your project: list what you’ve uploaded, summarize a document, or pull
the themes across everything.
Claude Code listing a project's files through the Chief MCP tools.
Connecting over MCP lets your agent talk to Chief. You can also ask it to build against
the Chief API — a script, a sync job, whatever you need — and it will read this
documentation and write the code.In your terminal, set your credentials so the agent doesn’t need them in the chat, then
describe what you want:
A few prompts to start from — paste one in and adjust it to your goal:
“Read the Chief API docs at https://dev.chief.bot. Using CHIEF_API_KEY and
CHIEF_PROJECT_ID from my environment, write a script that uploads every PDF in this folder
to my project and labels them contracts.”
“Ask my Chief project for the three biggest risks across everything we’ve uploaded this
quarter, and print the answer.”
“Create a Chief action that emails me a summary of new uploads every weekday morning.”
“Write a script that pulls this week’s new assets from my Chief project and posts a short
summary to our team’s Slack channel.”
Point your agent straight at the docs and let it read what it needs. There’s an
agent-readable index at https://dev.chief.bot/llms.txt.
The agent reads the reference, writes the code, and runs it.
Start small, then build up.
 After install, open the server in Cursor Settings → MCP and fill in your